Introduction to IoT
1. Whirlwind Tour Of IoT
2. Setup Development Environment
- Download and Install Arduino IDE from the Download Page of Arduino and follow the official Installation instructions.
- Our board is the WEMOS D1 Mini and it is based on the ESP8266 microcontroller from Espressif. Since the board is not produced by Arduino (company) it is not pre-installed in the Arduino IDE (software), however it is possible to install the add-on that allows us to program it using the entire Arduino ecosystem. To do so follow the instruction on the section "Install ESP8266 NodeMCU Add-on in Arduino IDE 2"
http://arduino.esp8266.com/stable/package_esp8266com_index.json,
https://raw.githubusercontent.com/espressif/arduino-esp32/gh-pages/package_esp32_index.json
3. Hardware Review
- Dev-Kit: WEMOS D1 Mini
- Microcontroller: ESP8266 12-E Chip. For more details of the microcontroller and board check the link ESP8266 hardware review
 |
| Source from Random Nerd Tutorials |
|---|
4. Soldering
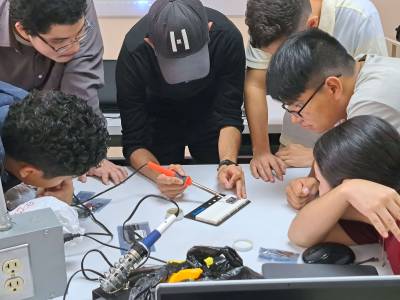
Here it gets practical! You need to solder the microcontroller and some of the sensors, which you will need in the next session.
 Fig. 1: In Action at UNICAES
5. Coding Warm-up
Now let's check if your Microcontroller works. Also, you will learn how to upload your first sketch. Basic Blink example:
- Blink.ino
void setup() {
  // initialize digital pin LED_BUILTIN as an output.
  pinMode(LED_BUILTIN, OUTPUT);
}

// the loop function runs over and over again forever
void loop() {
  digitalWrite(LED_BUILTIN, HIGH);  // turn the LED on (HIGH is the voltage level)
  delay(1000);                      // wait for a second
  digitalWrite(LED_BUILTIN, LOW);   // turn the LED off by making the voltage LOW
  delay(1000);                      // wait for a second
}